 |
|

01-22-2014, 09:54 PM
|
 |
|
|
Join Date: Mar 2009
Location: Sherwood Park
Posts: 4,320
|
|
 Smoker- recipes and mods
If there is enough interest Im willing to create a sticky thread for all smoker recipes, mods done to smokers, pics of smokers- do's and don'ts, likes and dislikes and create our own smoking community. Be great to share recipes and venture our from our usual smoking escapades. If interest follow below as discussed above 
I will start with my last thread and I had a few promise candy salmon recipe if we made a sticky. Once we have a few going, I will stick the thread.
Quote:
Originally Posted by Pixel Shooter

Watching Omega post his smoker threads got me off my butt!
Thought I would try pulled beef on the ol's smoker, did a dry rub and marinated for 24 hours. Tried out my new AMNPS, worth every penny. The hickory pellets smoked beautifully for 7 hours and still had about 3 hours worth left, no reloading ,fuss or muss and pellets cost about a buck for 10 hours. I also added a 90 degree elbow with vents open fully, made a big different, way better drafting. There wont be many wood chip smokes use in my future After 7 hours, wrapped it up in tinfoil and finished cooking for another 3.5 hours to my desired temp, then wrapped roast beef in tinfoil in a blanket filling up all the space in my cooler for another hour and a half and voila.
Dry rub:
Roast Rub (I used it on some chicken thighs too and they came out great!!!):
1 TBSP Garlic powder
1 TBSP Onion powder
1 TBSP Black pepper
1 TBSP Kosher salt
1 TBSP Paprika
1/8 TBSP Cayenne pepper
last minute I did add some brown sugar. I also smeared yellow mustard over the roast prior to putting the rub on, really helped everything adhere, works great. The ym evaporates with no taste to the meat
Smoker set at 225 degrees, smoked for 6-7 hours using hickory wood pellets, waited till internal temperature hit 160 degrees. pulled amnsp out and roast. wrapped roast in tinfoil as needed so no more browning, just cooking time. Put back in smoker until temps hit 195-200 degrees. take out in tinfoil, wrap in towels or blanket and put in cooler (key is no space in cooler) let sit for 2-3 hours. Take it out, will still be hot , should pull apart using fingers and serve to your liking

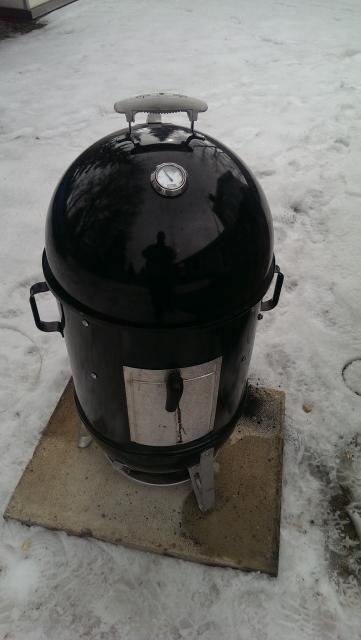
just put in the smoker

would have looked nicer if between the time I left to grab my iphone the kids didn't cut the strings and already started digging in, urghhhh

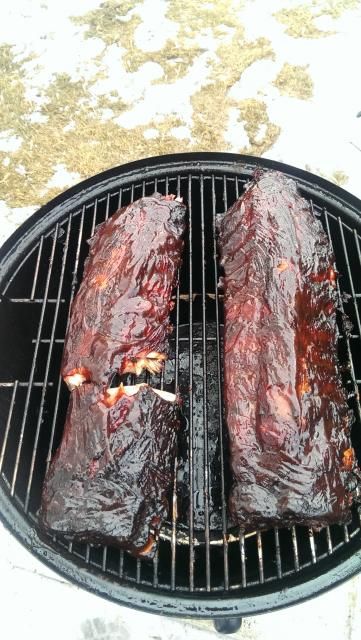
now ready to start eating, fell apart with the fingers,didnt need a knife or fork. most tender and juiciest roast beef I have had
 |
Last edited by Pixel Shooter; 01-23-2014 at 11:40 AM.
|
01-23-2014, 10:10 AM
|
 |
|
|
Join Date: May 2007
Location: Beaverlodge
Posts: 1,764
|
|

I built it out of 2x6 spruce. In retrospect I should have gone with 2x4 as some of these boards were badly warped. I had tie straps and come-alongs trying to get them as straight as possible. I ended up covering it in 1/4 inch plywood in order to cover up the gaps from the warped boards. I used 1x1 boards for the shelves. I got the seal for the door from a fireplace store. I use round 3/4 inch wood for hanging sausage.
The burner is from a fish fryer-it's smaller then the turkey fryer burners. I cut down the legs on the burner. The gas inlet is in the fresh air pipe coming in so that the fresh air cools the gas inlet line. The line is wrapped in fiberglass and reflective heat tape. Even without these I turned up the heat so the internal temp was over 300 and the gas line wasn't even warm to the touch. I use a small cast iron pan to burn the chips in. The bottom is a pre cut piece of sheet metal that I can take out and clean as the need arises. I had tried to make a baffle for more even heat dispersion but it didn't work out well hence the burn marks above the first set of shelves that I am going to take off.
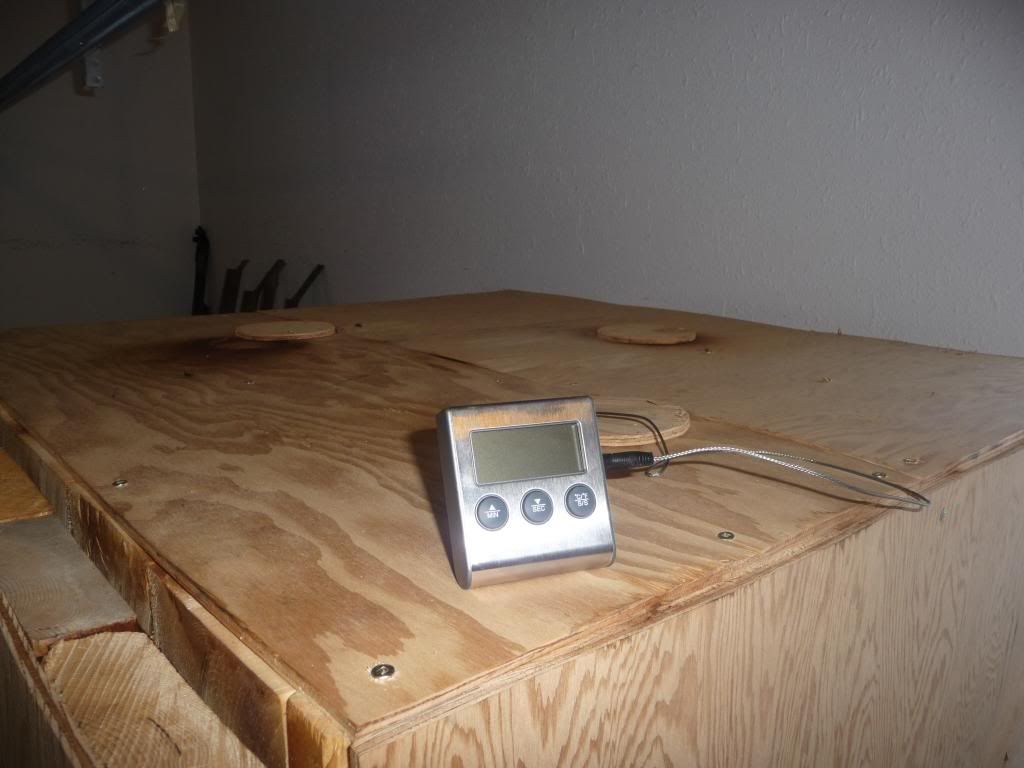
I have a temp. gauge about 3/4 of the way up for internal temp of the smoker.
I can control heat and smoke with these.
Have an external thermometer with a probe for whatever is in the smoker.
It is 6 and 1/2 feet tall. The bottom/burner is a foot up from the bottom. The internal dimensions are 32x31 inches and I use about 4 feet of the height. I've done over 30lbs of sausage and over 20lbs of jerky at a time with it.
__________________
__________________
Hunting isn't a matter of life and death......it's more important than that
|
01-23-2014, 10:14 AM
|
|
|
|
Join Date: Mar 2009
Location: Sherwood Park
Posts: 4,320
|
|
If your going to post pics of delicious results, how about giving us the process and recipe's in what you used so we learn hence the reason for the thread 
|
01-23-2014, 10:54 PM
|
 |
Gone Hunting
|
|
Join Date: May 2007
Location: Calgary
Posts: 1,708
|
|
Quote:
Originally Posted by Pixel Shooter
If your going to post pics of delicious results, how about giving us the process and recipe's in what you used so we learn hence the reason for the thread |
Sorry I wanted this to be sticky and did not have time for recipes when I've posted pictures.
I found learning about processing meat, that food safety is very important and at first I was concerned with adding too much of nitrates as different recipes vary slightly.
I have developed chart for mixing my wet brine to stay safe, using this brine meat will have 200 ppm nitrates or less.
I use digital kitchen scale accurate to 1 gram ( CT on special 9.99, Costco 19.99)
I use this formula for Hams (would use it for Bear as well) and Canadian Bacon
Formula is for 1 kg of meat ( 1000 grams )
Water 400 mls
Pickling salt by weight 30 grams
Cure no1 ( 5% Nitrates ) 4 grams
Brown sugar 3 grams
example
5 kg meat
take 5x400mls water =2000 mls or 2 Liter
add pickling salt 5x30 gr = 150 grams
add #1 5% Cure 5x4 gr= 20 grams
add Brown sugar 5x3 gr = 15 grams.
Instructions
1. combine water, salt, Cure #1 and sugar together.
2. Immerse ham in pickle for 10-14 days at refrigerator temperature. Overhaul (turn around) hams every few days. Canadian Bacon 5-8 days.
3. Soak for 3 hours in cold running water. Rinse in lukewarm water (86 - 104º F, 30 - 40º C), using a brush to clean the surface.
4. Hang or place on a screen for 12 - 24 hours to dry (in fridge)
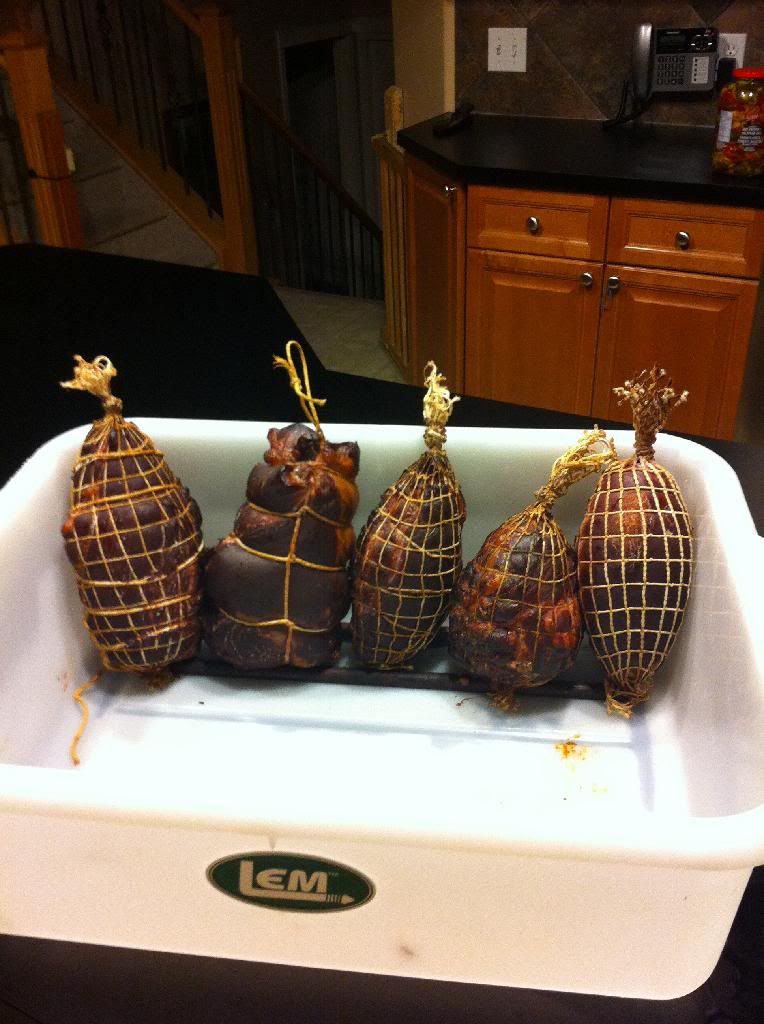
5. Stuff in netting or use butcher twine.
6. Smoke with warm smoke (86 - 104º F, 30 - 40º C), for 4 hours until skin develops light yellow - light brown color.
7. Insert ham into boiling water and keep boiling for 15 minutes. This will seal juices inside your ham. Lower water temperature to (176-180º F, 80-82º C) and continue cooking until the internal meat temperature becomes 154-158º F, 68-70º C. A rule of thumb calls for 50 minutes cooking for 1 kg of ham.
8. Place on shelves/screens to cool down.
9. Keep refrigerated.
Pork Hams

First attempt at WT Deer Ham. Looks good and was very good.
That's better post.
__________________
From Wikipedia
"No safe threshold for lead exposure has been discoveredthat is, there is no known amount of lead that is too small to cause the body harm."
150 TTSX vs Goat-WOW
http://youtu.be/37JwmSOQ3pY
Last edited by Andrzej; 01-23-2014 at 11:01 PM.
|
01-23-2014, 11:15 PM
|
 |
|
|
Join Date: Mar 2013
Location: Invermere, BC
Posts: 1,749
|
|
Reelhooker - They call those logs "fattys"
|
01-25-2014, 04:29 PM
|
|
Banned
|
|
Join Date: Feb 2009
Posts: 12,078
|
|
Request for smoking a bear ham
Has anyone ever smoked a bear ham?
What sort of special processing techniques would be required
Last, but not least, does anyone have a recipe for smoking a bear ham?
|
12-16-2014, 09:24 PM
|
 |
|
|
Join Date: Aug 2008
Posts: 827
|
|
Quote:
Originally Posted by Pixel Shooter
If your going to post pics of delicious results, how about giving us the process and recipe's in what you used so we learn hence the reason for the thread |
^this
__________________
.
|
01-08-2015, 07:05 PM
|
|
|
|
Join Date: Jan 2015
Location: Crossfield
Posts: 216
|
|
Hah! Reading this thread has made me more motivated to build a cold smoker. Any one have any plans or links to some good plans?
Thanks!
|
01-09-2015, 12:45 PM
|
|
|
|
Join Date: Jan 2015
Posts: 9
|
|
Cold Smoker Build
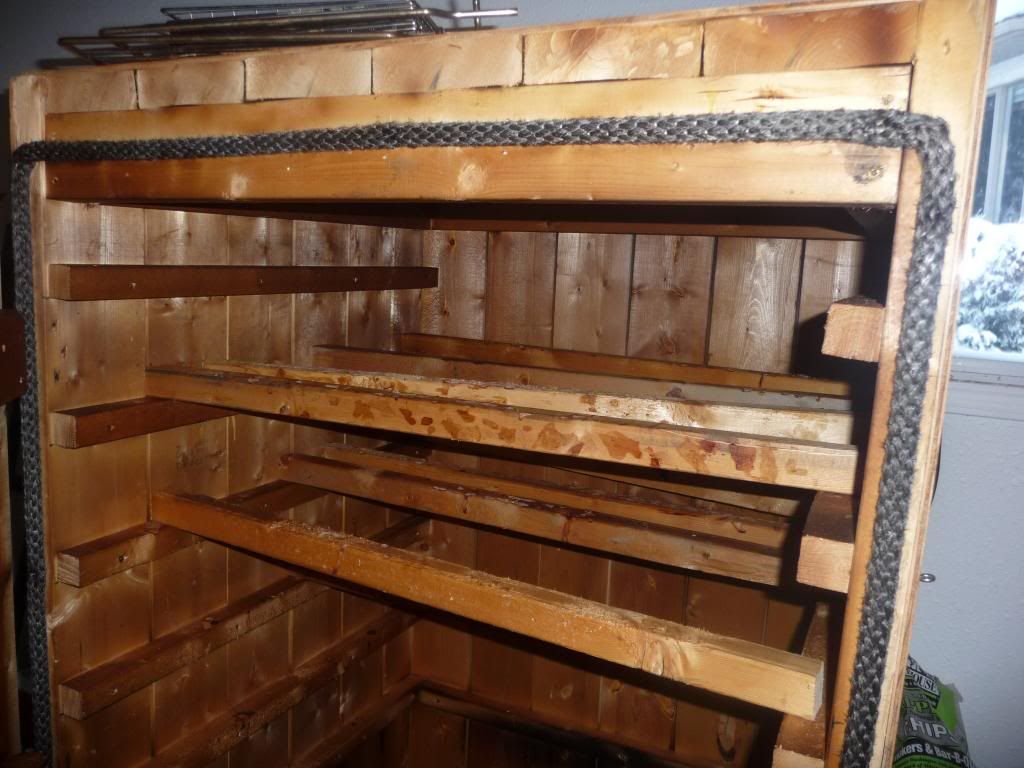
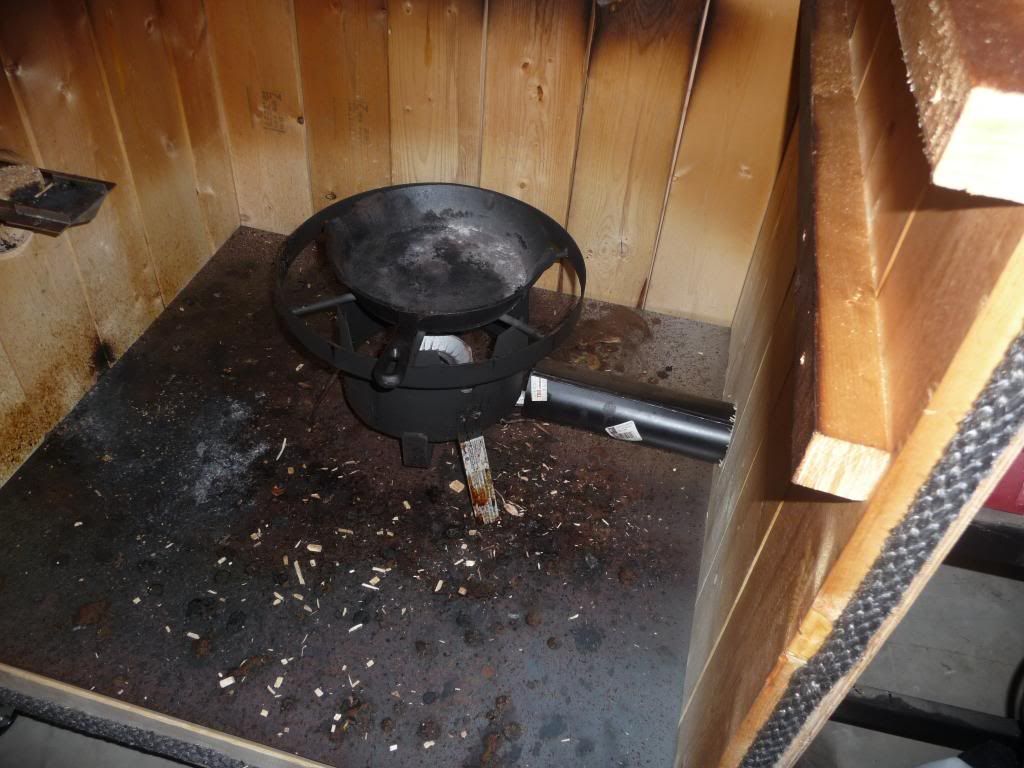
I don't have any detailed plans on paper. Kind of just built as I went. Its build from 3/4 hardwood plywood with a formaldehyde free adhesive so it does not off gas. It is lined with mill aluminum sheeting that has no oil coating on it. Simple 110V element, used the A-Maze-N smoke generator and a PID controller from Auburn Instruments. It works extremely well for cold smoking! Had to play around a bit with the wood chips as pellets produced way too much smoke and there is no sawdust fine enough locally that would burn slow and consistently. Ended up wetting the pellets to break them apart, then drying in oven. Kind of a PITA, but the results are excellent.
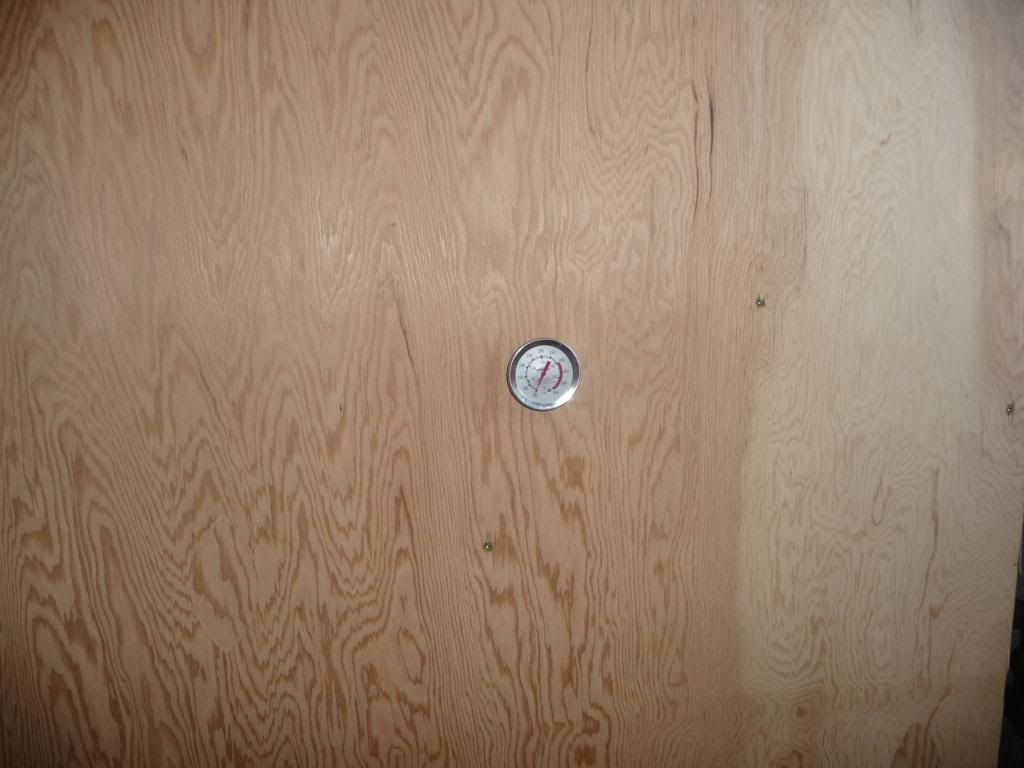
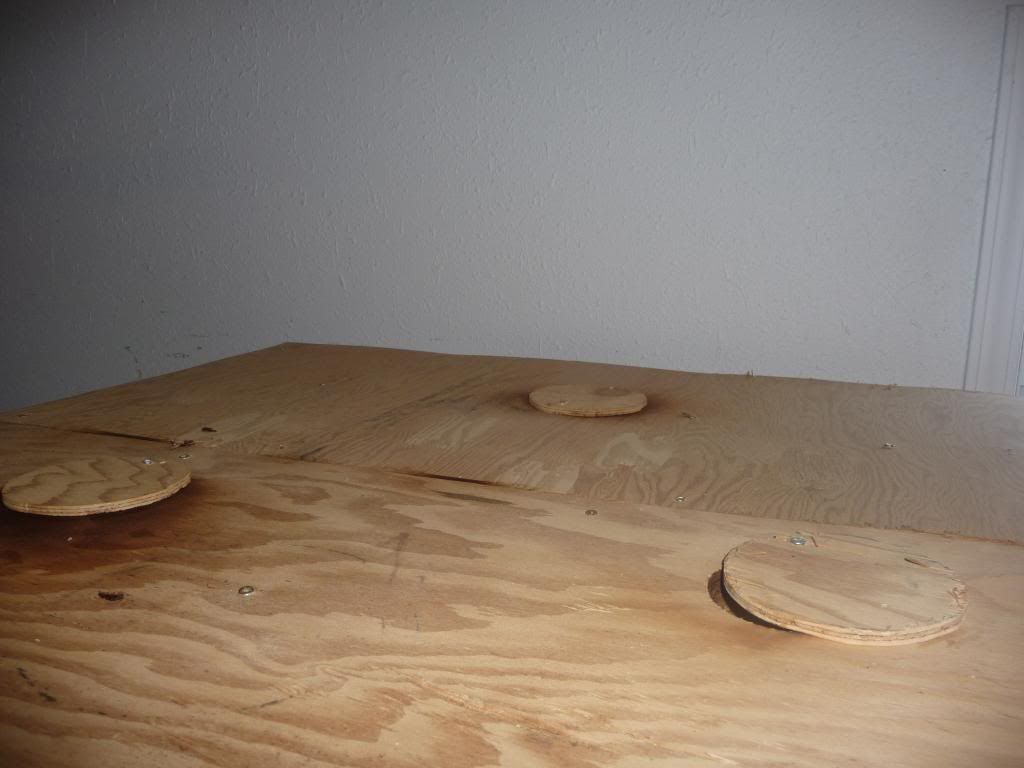
Was working on a home made PID controller using an Arduino system, where I could monitor and change the temperature from my cell phone. Has 4 analog thermometers in the door to monitor temperature gradients, 4 digital temperature sensors, automatic temp bumps, etc. All works really well, but the PID part of it is not working nearly as good as the Auburn Instruments controller. Stay tuned. Attached are some pics. Let me know if you have any questions and will try to help. There are things I like and things I would do different on the next build....
http://i1380.photobucket.com/albums/...psfd90174d.jpg
http://i1380.photobucket.com/albums/...ps7fb24050.jpg
http://i1380.photobucket.com/albums/...ps751af7ff.jpg
http://i1380.photobucket.com/albums/...ps9a712cb3.jpg
http://i1380.photobucket.com/albums/...pse7843289.jpg

|
01-23-2014, 10:19 AM
|
|
|
|
Join Date: Jan 2011
Location: Alberta somewhere
Posts: 2,520
|
|
I think its a great idea as I have been tossing around the idea of getting a smoker for myself.
The title should come with a warning as all this is making me hungry. 
__________________
If your ad in the Buy & Sell is for an item that is sold, do us all a favour and mark the header SOLD - PLS REMOVE.
|
01-23-2014, 06:32 PM
|
|
|
|
Join Date: Sep 2013
Posts: 25
|
|
Let see some smokers! Better to build or buy?
|
07-30-2020, 10:28 PM
|
|
|
|
Join Date: Mar 2019
Location: Southern Alberta
Posts: 22
|
|
Quote:
Originally Posted by D-Dub
Let see some smokers! Better to build or buy?
|
I bought a Master Built and a friend built his own from an old fridge. We both ending up spending the same amount, $200.
|
08-01-2020, 09:38 AM
|
 |
|
|
Join Date: Dec 2009
Posts: 8,494
|
|
Picnic Tasso
Stocked up on BI Picnics a few weeks ago-Generally I Tasso Coppas, but decided to give this a try. Saved the skin for a collagen extraction for Sausage. Bone went in smoker for the hound and the rest I cut into 1" strips and applied the cure and into a ziplock for the fridge.
Will be ready for hot smoking in the morning. About $7 all in for 5 lbs Tasso
__________________
You're only as good as your last haircut
|
01-23-2014, 09:38 PM
|
|
|
|
Join Date: Apr 2008
Location: i have a home in calgary however i live as much of my life as possible in the woods
Posts: 968
|
|
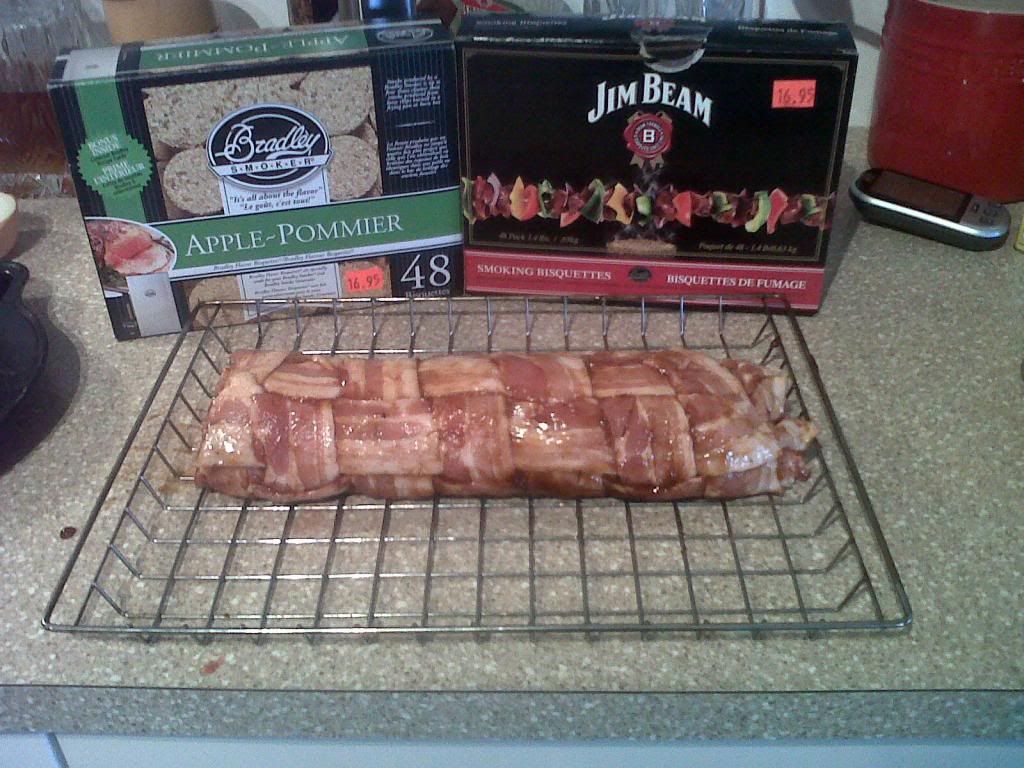
This is what somkers are for..
This is a recipe I do fairly often. In fact I do maybe 24 or so of these logs a year for different events and occasions...
Cardiologists everywhere love me:
I Start the day with a theme that includes:
3 packs of bacon. Yes, you can use maple bacon if you should so choose.
1kg of Johnsonville's spicy Italian ground Pork Sausage
500g of Johnsonville's Regular ground Pork Sausage
500G smoked dutch Gouda (grated)
And to keep with the theme, for the cook(s): one Bakon flavoured vodka Ceaser.
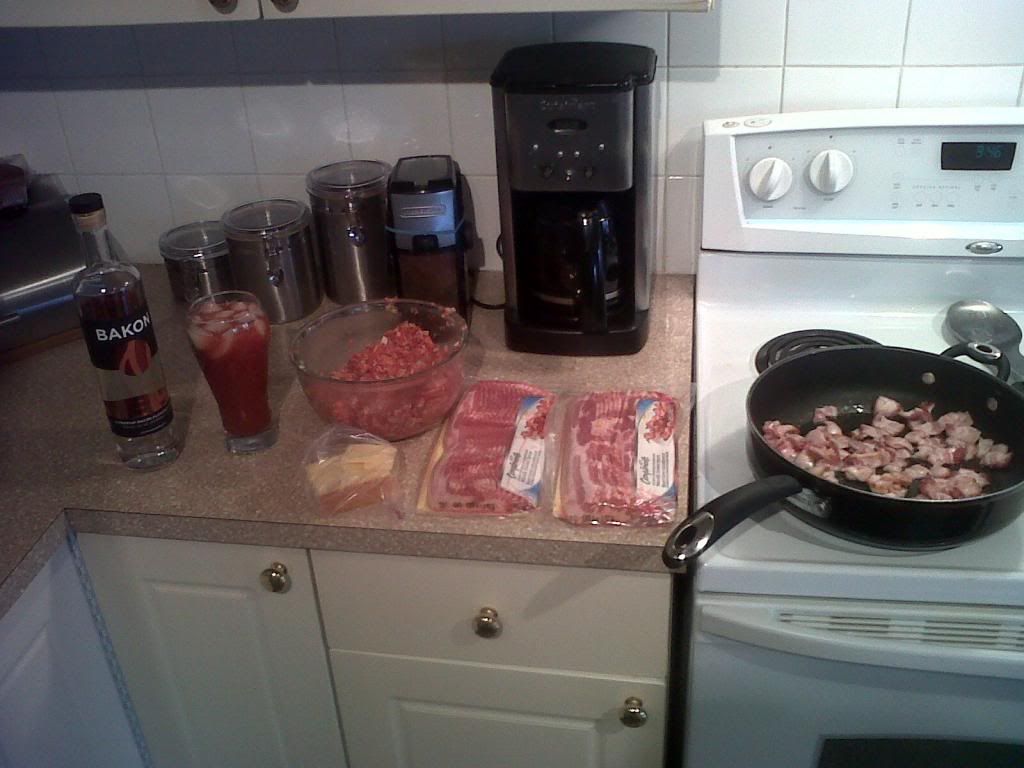
One Pack of bacon should be cut into 1" chunks and crisp fried. the other two are woven such as this into a "Blanket of Glory"
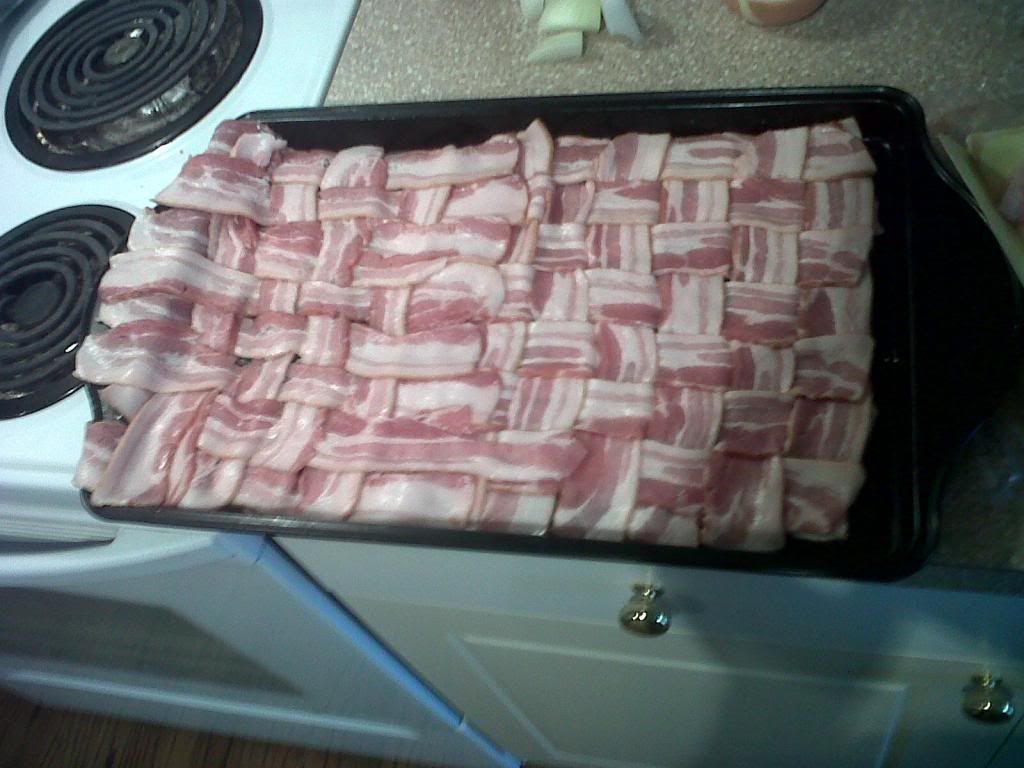
Then the Sausages-mixed together,topped with the Crisp fried bacon and then finally the smoked Gouda are layered on top:
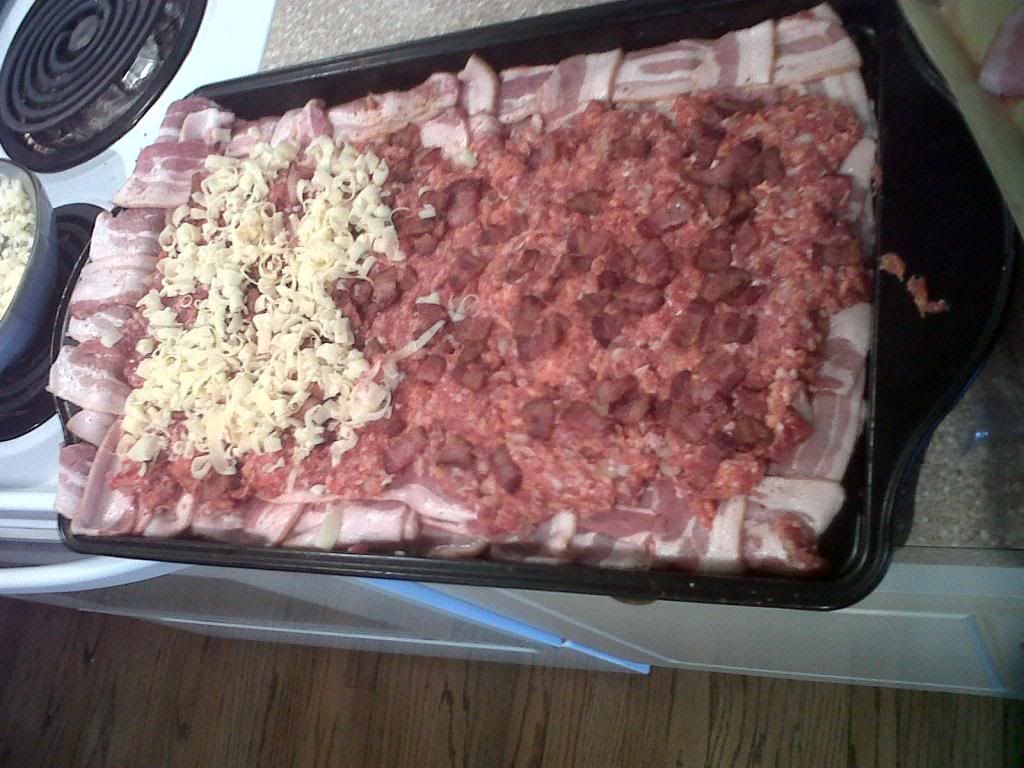
The cheese goes all the way across the filling, this is just where I happened to take the picture... And ya, we are on to the second Bakon Ceaser by now.
Once you're layers are even, you want to roll this "Blanket of Glory" into the "log of Life" lol:
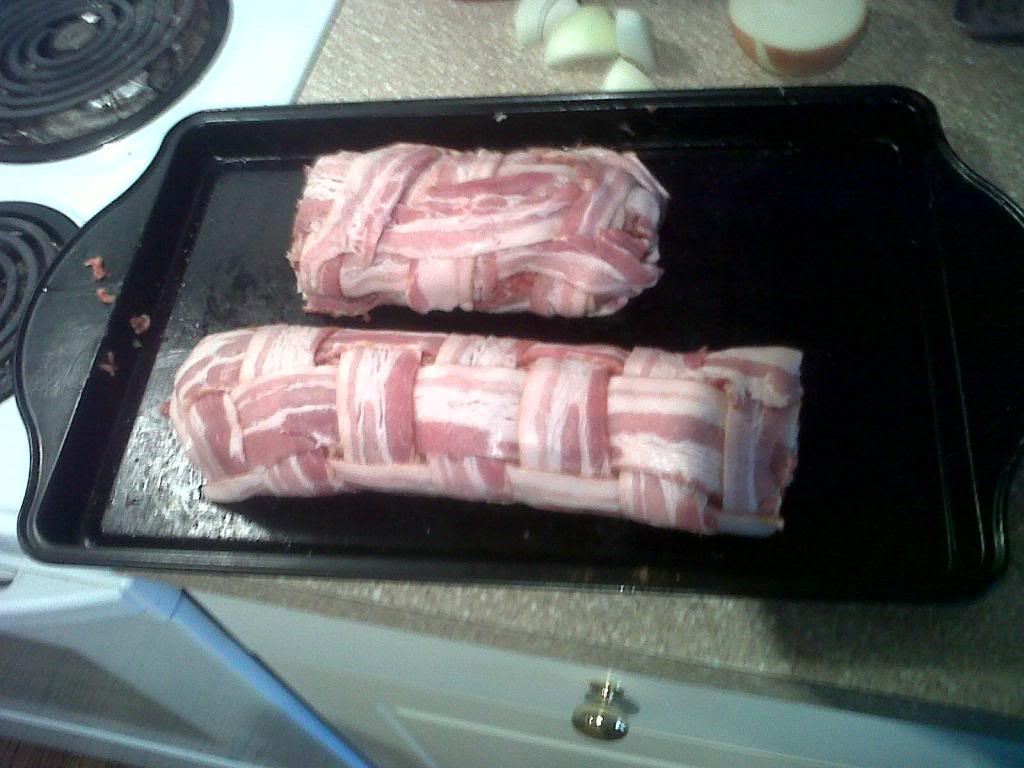
Coat with a high sugar content sauce. Mine is homemade with about 1 cup of brown sugar to a cup of light soy and some sesame oil.
Let it "air Dry" for an hour or so at room temp then into the smoker at 180c. after 20 minutes start smoke for 1:30min. I like 1 hour of apple followed by 30 min of the JB.

After 30 min flip and re-coat with sauce,
Check your temp and if it's ready take it out and let it set under tinfoil. it should look like this when done: 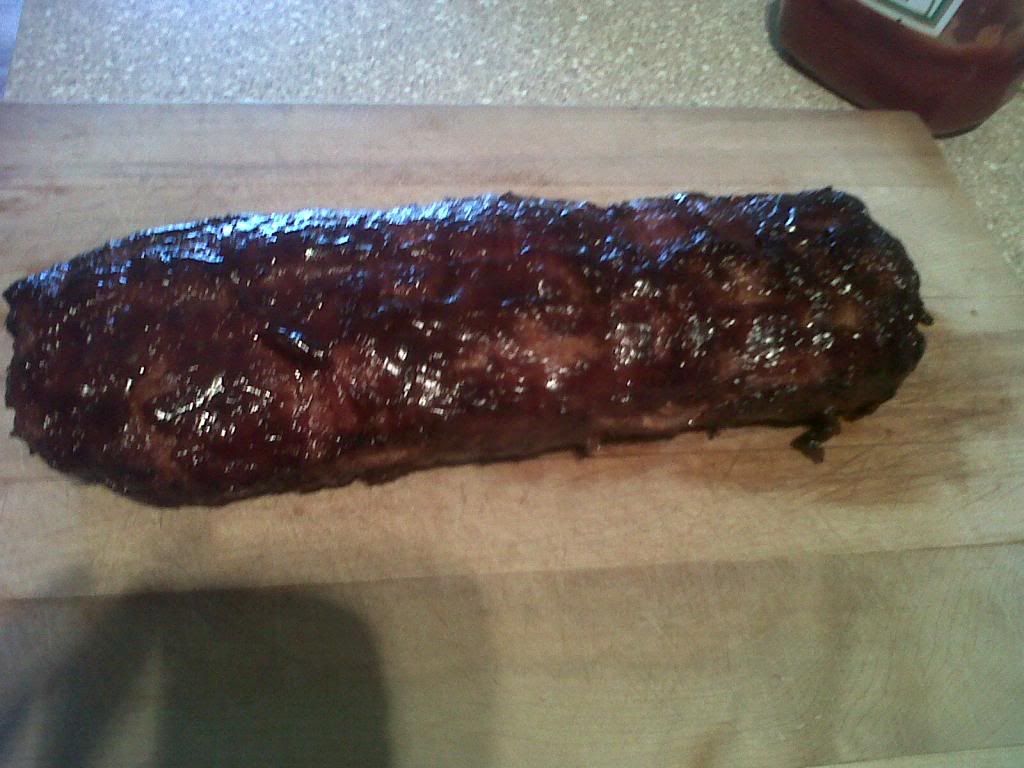
You then want to slice it and serve.
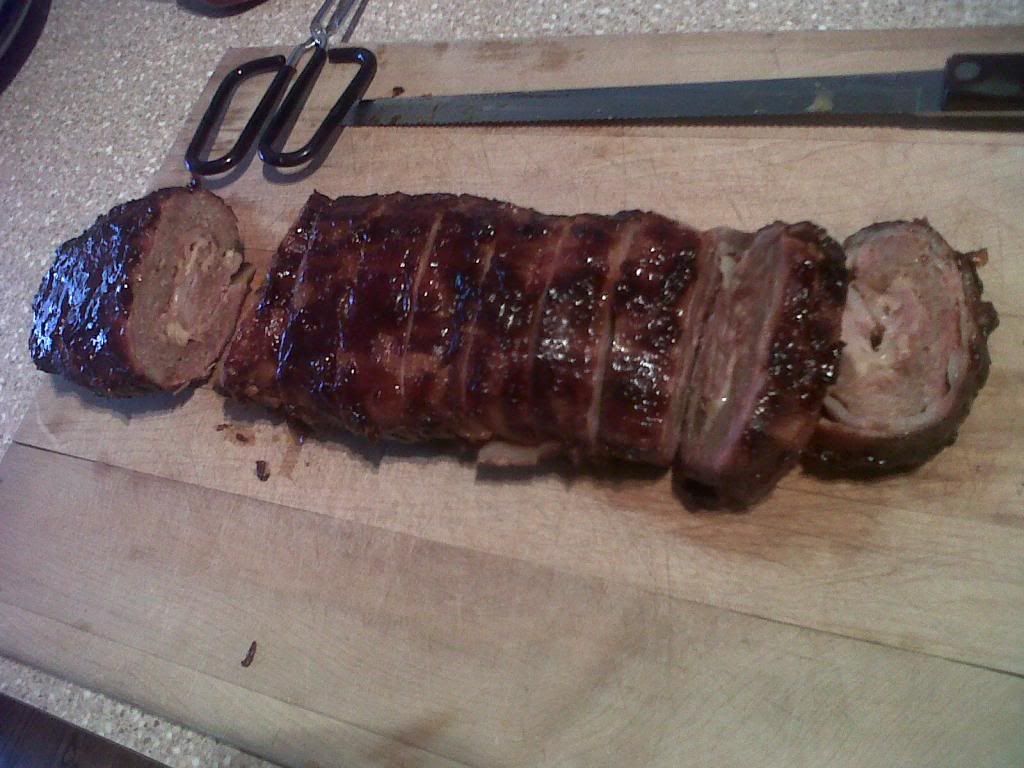
Smaller Logs (3.5"-4.5") are great served on a slice of toasted baguette with a slice of sharp white cheddar melted on top. Larger sliced are great as burger patties themselves. Once sliced, it can be nice to throw them on the grill for 1 min each side to sear the up. whatever leftovers you have will make the best breakfast sandwich of your life and after that dice whatever is leftover into bacon bits for the most phenomenal Smoked Ceaser salad or on a baked potato.
I have made this with a variety of different seasonings, Methods of serving and types of bacon. It is always good, however you have to ensure that any bacon on the inside is crisp cooked prior to smoking/cooking. If not, you will end up with fatty(not the good fat)portions in your meal.
Hope y'all enjoy,
Reel.
__________________
I was once told to beware the Head of the Dragon. I asked why, as I have already married the Tail!
Last edited by reelhooker; 01-23-2014 at 09:43 PM.
|
09-30-2015, 04:46 AM
|
|
|
|
Join Date: Sep 2015
Posts: 12
|
|
This is so goddamn beautiful
|
03-09-2014, 06:09 PM
|
|
|
|
Join Date: Sep 2007
Posts: 41
|
|
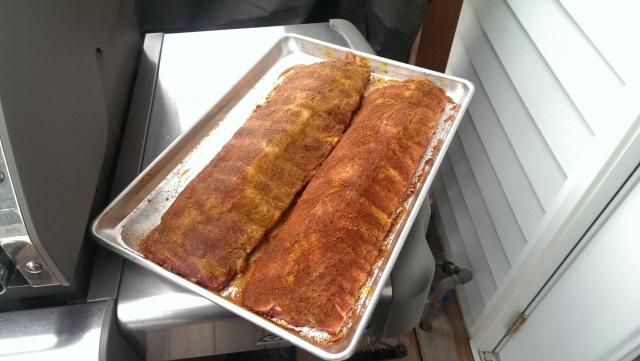
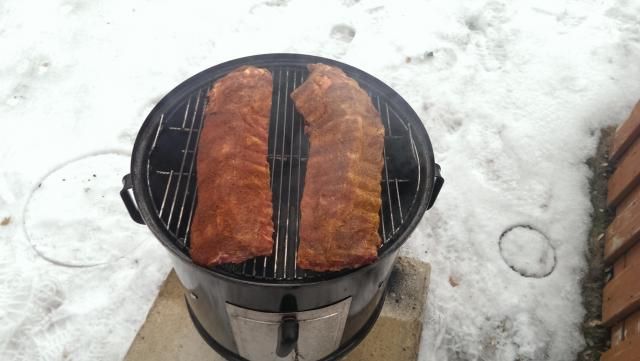
Sunday Baby Back Ribs
Last edited by Pixel Shooter; 03-10-2014 at 10:13 AM.
|
03-09-2014, 06:23 PM
|
|
Banned
|
|
Join Date: Jan 2014
Posts: 350
|
|
Mmmm mmmm Grrrrrrreat thread!!!!!
I vote for a hunter/fisher cooking forum.
All for?
Say I
|
03-16-2014, 11:42 AM
|
|
|
|
Join Date: Mar 2013
Location: Invermere, BC
Posts: 1,749
|
|
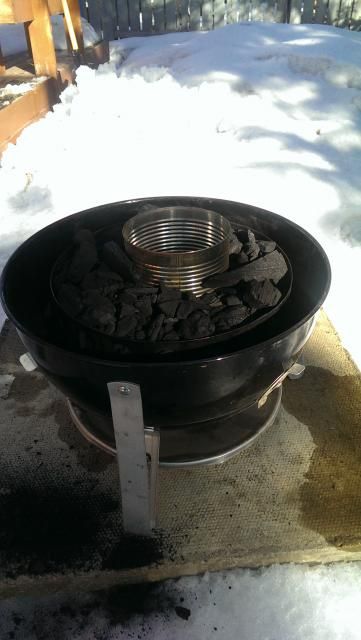
Doing a bit of experimenting with marinades today on the UDS and country style ribs. Also doing some chicken adobo. Both have been marinading for 24hrs and the chicken will get finished off in the pot once it absorbs some smoke.
Pics to come.
Edited to add: Nice post Heater! That looks awesome! How do you like that Weber?
|
03-16-2014, 02:33 PM
|
|
|
|
Join Date: Mar 2013
Location: Invermere, BC
Posts: 1,749
|
|
Prep:

Chicken Adobo


Left-Right: Salt,pepper and oil. These will be guinea pigs for a new BBQ sauce recipe. Middle is Cuban orange marinade, and the right is an Asian style with ginger, garlic, soy sauce marinade.
On the grill:

|
04-03-2014, 06:31 PM
|
|
|
|
Join Date: Nov 2013
Posts: 24
|
|
|
04-03-2014, 08:30 PM
|
 |
|
|
Join Date: Nov 2011
Location: Grande Prairie AB
Posts: 294
|
|
Mine finally arrived today. Going to pick it up tomorrow afternoon and season her up.
|
04-03-2014, 09:50 PM
|
 |
|
|
Join Date: Dec 2008
Location: Alberta
Posts: 24,071
|
|
__________________
Only dead fish go with the flow. The rest use their brains in life.
Originally Posted by Twisted Canuck
I wasn't thinking far enough ahead for an outcome, I was ranting. By definition, a rant doesn't imply much forethought..... 
|
04-04-2014, 11:03 AM
|
|
|
|
Join Date: Dec 2009
Posts: 8,494
|
|
Cajun Tasso Recipe
Omega Jr been asking me to pass on some of my recipes to him.

So I got him to make some Cajun Tasso. I used pork, but regularly Tasso Duck, Geese and Turkey Legs
Got him to cut a Coppa into 1" thick strips and rub with my Tasso Rub
Tasso Rub per kg of meat
23g Salt
10g Onion Powder
10g Brown Sugar
6g Ground Black Pepper
6g Ground White Pepper
5g Garlic Powder
3.7g Cure
3g Paprika
2g Cayenne Pepper
1g Allspice
1g Ground Cumin
Combine evenly and dredge/rub onto meat surface coating evenly.
Place in non-reactive container and let cure minimum of 48 hours. I just cryovac and then refrigerate

Tasso after curing

Then rack the strips. I place them on my bacon hooks for convenience. Either way works fine.
Then into the Smoker.

Heat cabinet to 120F( no smoke yet) til dry- 4-5 hours
Then introduce smoke( I use Hickory) raising cabinet temps by 10F every 1/2 hour to a max cabinet temp of 180F until the Tasso comes to an internal temp of 152F
I give a minimum of 4 hours smoke, but prefer 5-6 hours.
Will post finish pics about 10pm 
__________________
You're only as good as your last haircut
|
04-04-2014, 08:14 PM
|
|
|
|
Join Date: Dec 2009
Posts: 8,494
|
|
Tasso- Back Bacon Duo
Tasso is done- about 10 hours including dry time.
Figured why waste smoke- so did my back bacon at the same time

Well dried Tasso

White Peppered Back Bacon


Maybe some Bagel Bennys for breakfast
__________________
You're only as good as your last haircut
|
04-11-2014, 10:32 AM
|
|
|
|
Join Date: Feb 2012
Posts: 133
|
|
Please excuse my ignorance but what is coppa. Also noticed that for the marinate mixture there is no fluids except what may come from the meat is this a correct assumtion
This recipe has certanily got my attention cant wait to try it.
Thank-you for sharing
|
04-04-2014, 08:34 PM
|
 |
|
|
Join Date: Feb 2012
Location: N. E. of High River
Posts: 4,985
|
|
Quote:
Originally Posted by Ken07AOVette
|
OMG does that ever look good How does it taste? Prep? Smoke? Time? Temp etc? Please
|
04-05-2014, 09:06 AM
|
|
|
|
Join Date: Aug 2008
Posts: 827
|
|
I did some smoking yesterday. Beckon and pork loins.
__________________
.
|
04-05-2014, 10:23 AM
|
|
|
|
Join Date: Dec 2008
Location: Alberta
Posts: 24,071
|
|
Quote:
Originally Posted by covey ridge
OMG does that ever look good How does it taste? Prep? Smoke? Time? Temp etc? Please |
4 cups brown sugar 2 cups kosher salt 2 tsp garlic powder 1 tbsp pepper. I rinsed then deboned then cut the slices left skin on. I placed one filet in a big plastic bowl, covered with the mixed ingredients, next piece, repeat and cover all completely, covered and let sit in the fridge for 24 hrs, mixing every few moving top to bottom and keeping everything soaking. I was amazed how much liquid was made.
I then rinsed the fish, paper towel dried and left it on the counter to air dry for a few hours.
When the new smoker failed I had to put the salmon in the fridge overnight.
I smoked with alder for 2 hours no heat. Then another 2.5 hours at 150f, then 2.5 hours at 200f.
I took the fish out and noticed that it was very tasty but also very oily. I put 1 piece in again at 180f and alder smoke for another 3 hours, this time skin side up. I did a maple syrup glaze on this piece, and am very happy with the outcome.
__________________
Only dead fish go with the flow. The rest use their brains in life.
Originally Posted by Twisted Canuck
I wasn't thinking far enough ahead for an outcome, I was ranting. By definition, a rant doesn't imply much forethought.....
|
05-04-2014, 01:56 PM
|
|
|
|
Join Date: Jul 2009
Location: Red Water, Alberta
Posts: 23
|
|
kind of sad
I was hoping to see some really good deer and moose recipe's like summer sausage - although those pork ones are looking good as well as the trout tails. I hope now that the spring has sort of shown up we can see some more good stuff coming. I bought my smoker at the end of summer last year (hell of a good price that time of year) I is set up and ready to go.
I've been doing some reading and see some good start up recipe's to get the hang of things but come fall I'm looking forward to making some great sausage. I need some help please YUMM YUMM YUMM LOL

|
05-04-2014, 02:12 PM
|
|
|
|
Join Date: Feb 2012
Location: N. E. of High River
Posts: 4,985
|
|
Quote:
Originally Posted by CANADIANWOMAN
I was hoping to see some really good deer and moose recipe's like summer sausage - although those pork ones are looking good as well as the trout tails. I hope now
|
I decided to get a couple recipe books and I signed up for one of CTR Refrigeration's one day courses on sausage making. I hope to be be ready by fall.
|
 Posting Rules
|
You may not post new threads
You may not post replies
You may not post attachments
You may not edit your posts
HTML code is Off
|
|
|
All times are GMT -6. The time now is 03:57 PM.
|


 Hybrid Mode
